
What Is a Waterproofing Membrane?
A waterproofing membrane is a continuous, flexible barrier applied to walls, floors, or both that prevents water from passing through into the structure beneath. In bathrooms, showers, and wet areas, it sits between the wet environment and your building materials, acting as the primary line of defence against moisture damage, mould growth, and structural deterioration.
The key properties that make a waterproofing membrane effective:
- Seamless coverage — no gaps, joints, or weak points for water to penetrate
- Flexibility — accommodates structural movement without cracking or separating
- Hydrostatic resistance — withstands ongoing water pressure from showers, baths, and wet floors
- Adhesion — bonds correctly to the substrate beneath for long-term performance
- Durability — maintains its integrity for years in high-moisture environments
Everything above the membrane — tiles, grout, fixtures — depends entirely on this layer performing correctly.

How a Waterproofing Membrane Works
When water hits a tiled shower floor, it doesn’t just run down the drain. Some of it works through grout lines, around fixture bases, and into the substrate beneath. Without a membrane in place, that moisture migrates into your walls, floors, and building structure — and stays there.
The membrane sits between the wet environment and your substrate as a continuous barrier. Water hits the surface, can’t pass through, and drains away as it should.
What makes this layer work is continuity. A membrane with a gap — even a small one — will eventually fail. Water finds the path of least resistance, and any weak point becomes that path.
The tiles don’t waterproof. The grout doesn’t waterproof. The membrane does.
Types of Waterproofing Membranes
Not every membrane suits every application. The type selected needs to match the substrate, the wet area, and the conditions it’ll be exposed to — including Newcastle’s coastal humidity and salt air.
Selecting the Right Membrane for Your Project
Picking a membrane off a shelf without assessing the project first is one of the most common reasons waterproofing fails. The right membrane depends on several factors specific to your job.
Key selection factors:
| Factor | What We’re Looking At |
|---|---|
| Substrate type | Concrete, fibre cement, masonry, or timber each behave differently |
| Wet area application | Shower, bathroom floor, balcony, laundry — each has different exposure levels |
| Movement expectations | Older Newcastle homes, particularly on reactive clay soils, need higher flexibility ratings |
| Coastal conditions | Salt air and humidity accelerate deterioration — membrane selection needs to account for this |
| AS 3740 compliance | Australian Standard for wet area waterproofing sets minimum requirements for membrane type and application |
Newcastle’s coastal environment adds a layer of consideration that doesn’t apply everywhere. Homes within a few kilometres of the ocean — across suburbs like Merewether, Bar Beach, Cooks Hill, and Hamilton — face higher humidity levels and salt-laden air year-round. The membrane selected needs to hold up in those conditions long term, not just on installation day.
Surface Preparation Before Membrane Installation
Good preparation is what separates a membrane that lasts from one that fails within a few years.
Assessing and Repairing the Substrate: Before any membrane goes on, we check the substrate for cracks, voids, soft spots, and movement. Existing damage needs to be repaired and stabilised before application — membrane applied over a compromised substrate doesn’t fix the problem, it just hides it temporarily.
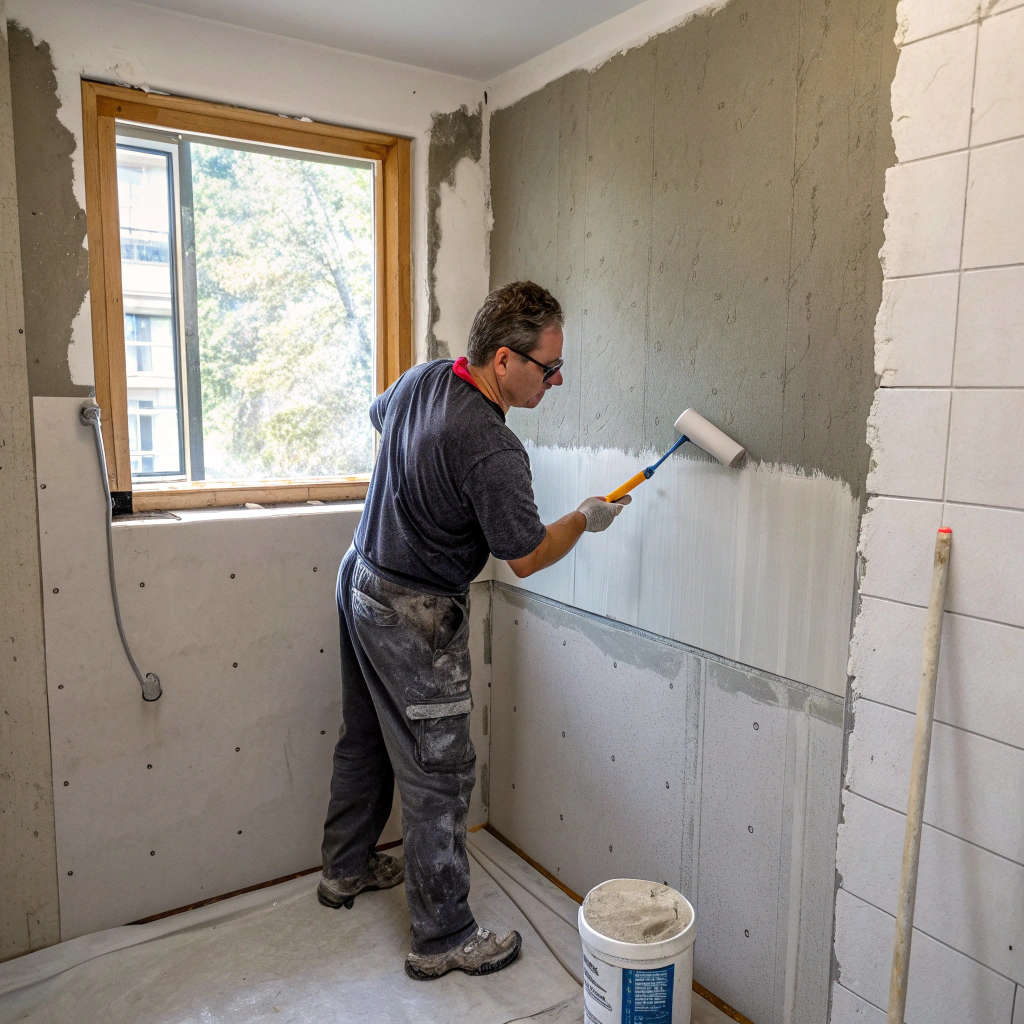
Cleaning and Priming: The surface needs to be clean, dry, and free of dust, grease, or contaminants that would prevent the membrane from bonding correctly. Most applications also require a primer coat specific to the substrate type — this improves adhesion and reduces the risk of delamination over time.
Why Poor Preparation Causes Membrane Failure: A membrane bonds to whatever is directly beneath it. If that surface is dusty, damp, cracked, or unstable, the membrane can’t perform as designed — regardless of product quality or application method. Poor preparation is rarely visible once tiling is complete, which is exactly why it gets skipped. The consequences show up months or years later.
The Membrane Installation Process
Here’s how we approach every waterproofing membrane installation from start to finish.
Initial Assessment and Membrane Selection: We inspect the substrate, wet area type, and project conditions before selecting a membrane. The product and method get chosen based on your specific job — not whatever’s easiest or cheapest to apply.
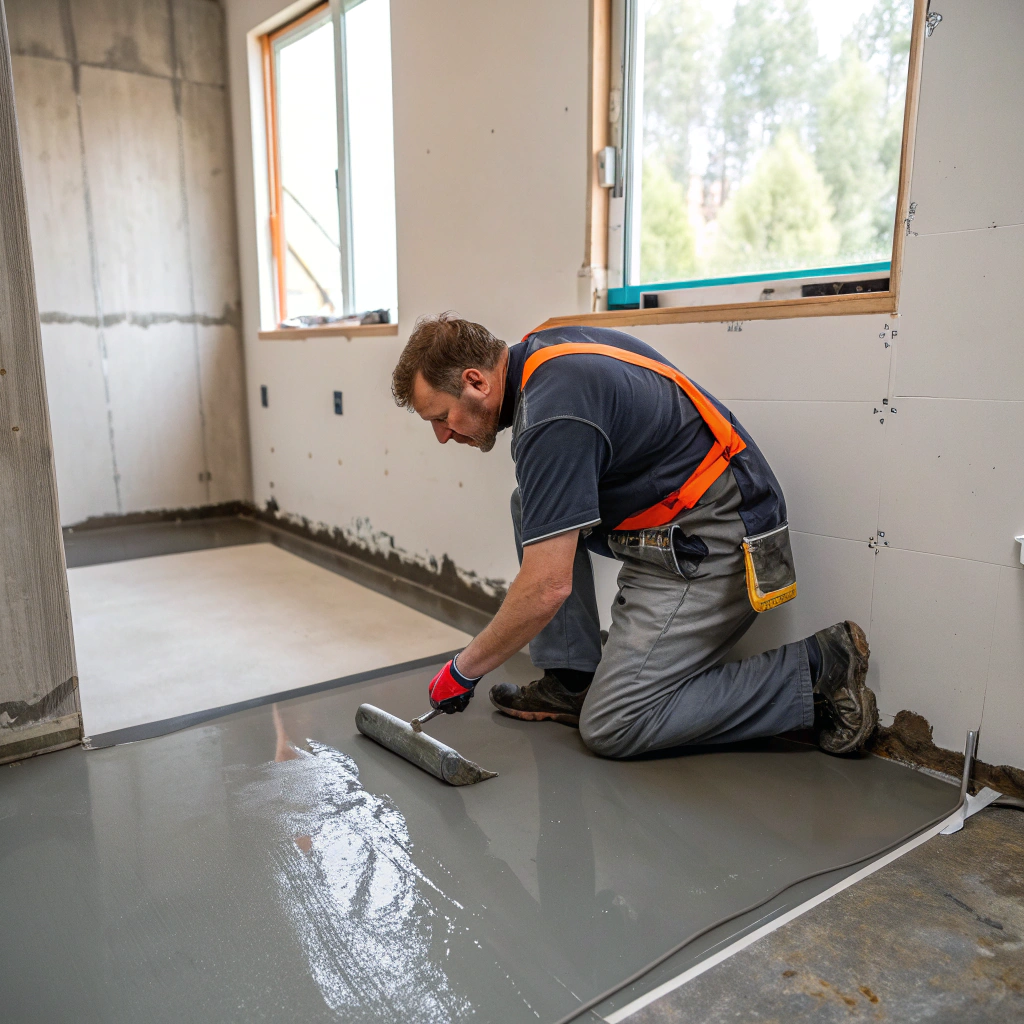
Applying the Membrane — Coverage, Corners, and Edges: The membrane is applied across all required surfaces to the correct coverage rate specified by the manufacturer. Corners and internal angles get additional reinforcement — these are the highest-risk points in any installation and need extra attention.
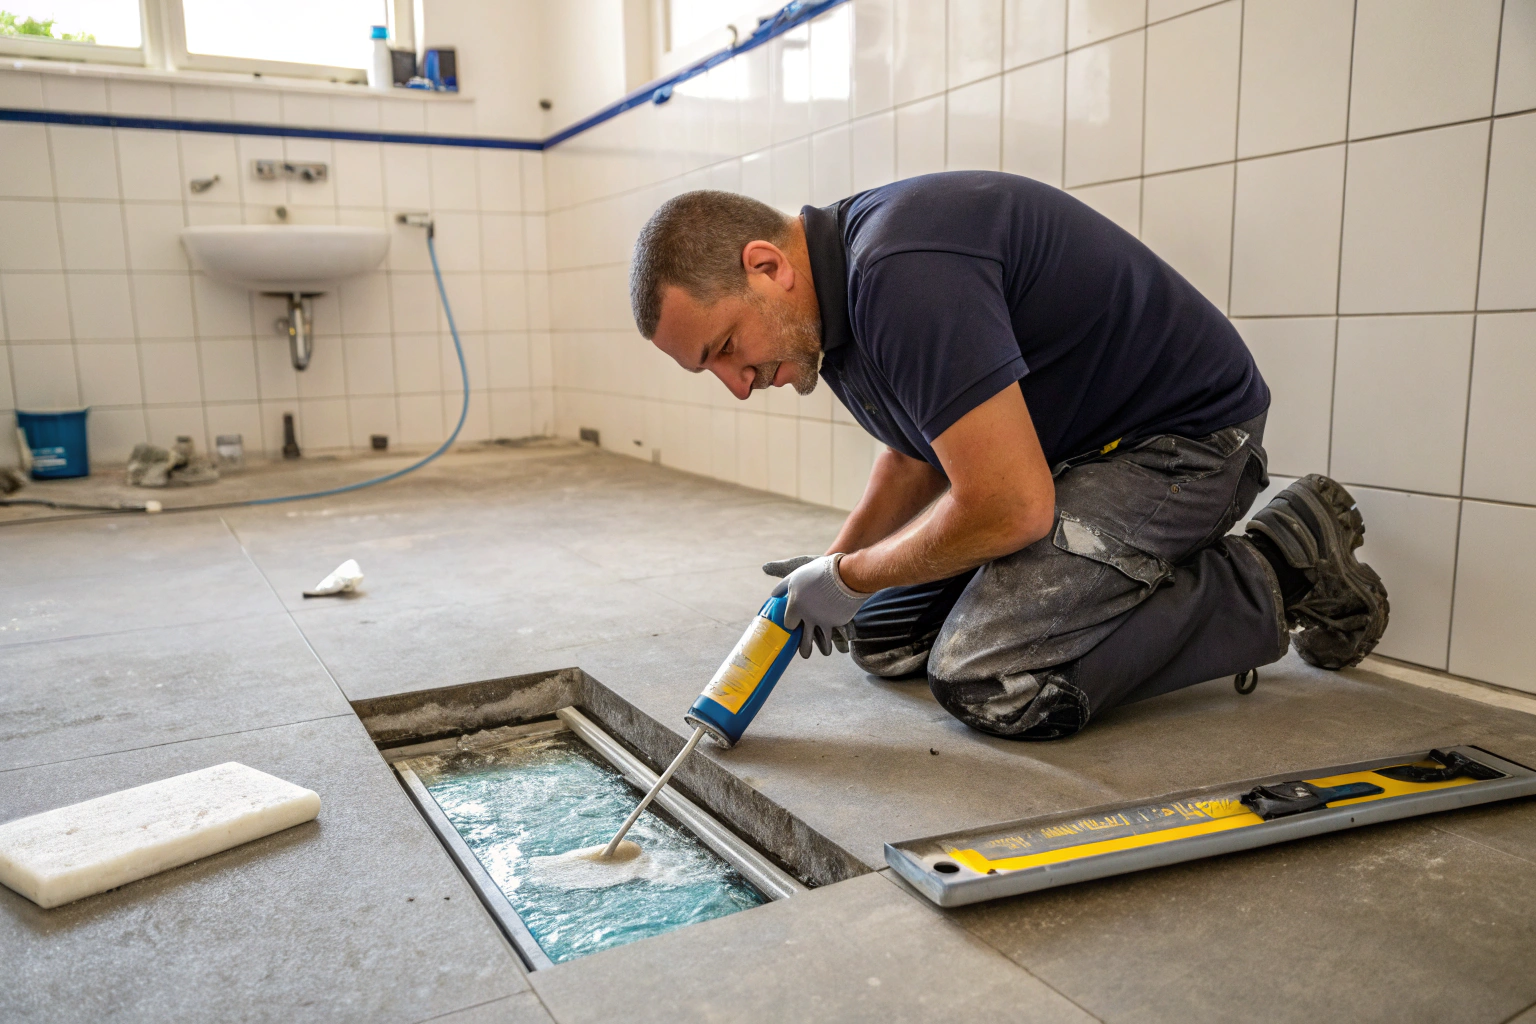
Sealing Penetration Points and Fixtures: Every pipe, drain, and fixture penetration gets individually sealed. These points are where water most commonly finds its way through, and they need to be treated as carefully as the flat surfaces.
Curing Time and Final Inspection: Once applied, the membrane needs adequate curing time before tiling begins. We don’t rush this stage. After curing, we carry out a final inspection to confirm coverage, adhesion, and integrity across the entire installation before any work proceeds on top.
Critical Points Where Membrane Installation Fails
Most membrane failures happen in the same places, every time.
Corners and Internal Angles: Flat surfaces are straightforward. Corners need reinforcement tape and additional membrane — inadequate coverage here is one of the most common installation failures we see.
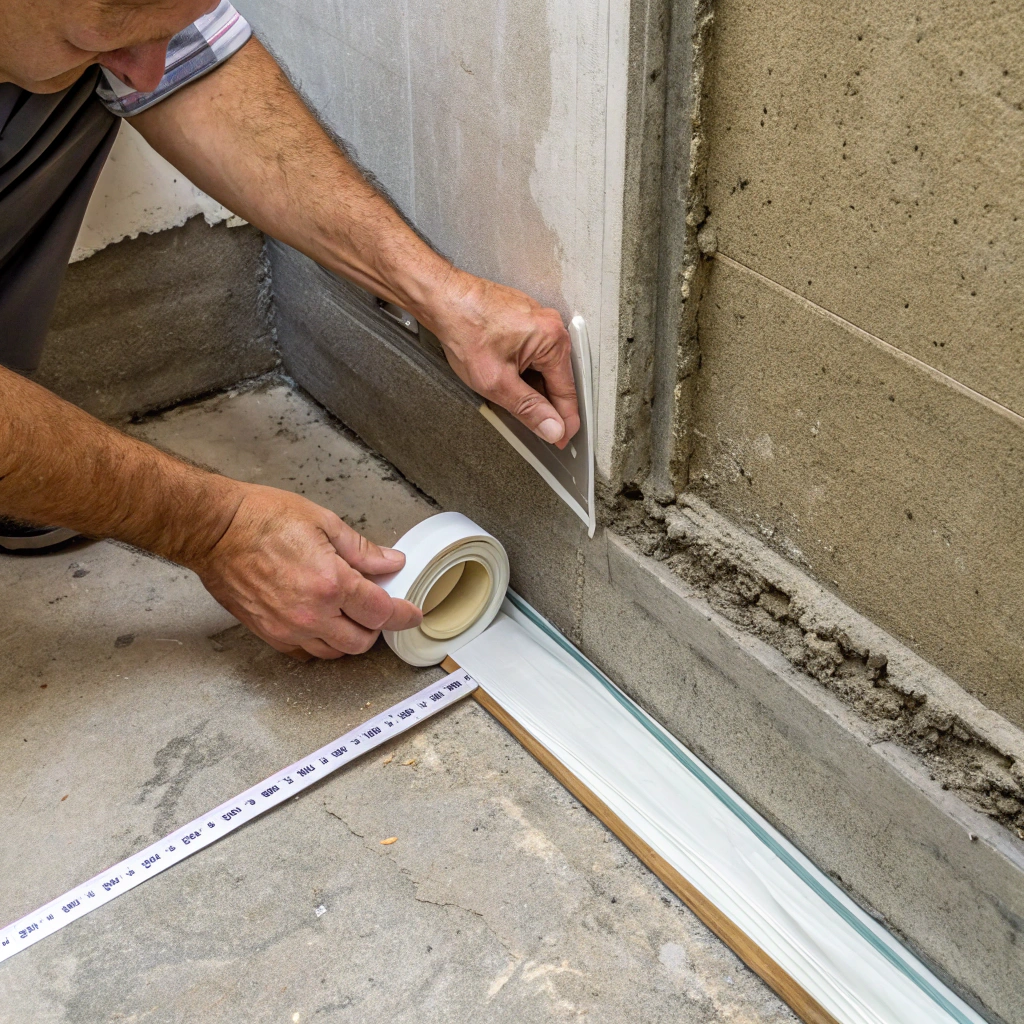
Joints Where Two Surfaces Meet: Where walls meet floors or each other, there’s movement. A membrane that doesn’t account for that movement will crack at these joints and allow water through.
Penetration Points Around Pipes and Fixtures: Every drain, pipe, and fixture base needs to be individually sealed and collared. A membrane that terminates at the edge of a penetration will let water through.
Transition Points Wall-to-Floor: The wall-to-floor junction experiences movement, collects water, and is consistently the first place a poorly installed membrane allows moisture to penetrate.
Where Waterproofing Membrane Installation Fits in Your Project
The membrane goes in after the substrate is prepared and before any tiling or fixtures — there’s no flexibility on that sequencing.
Sequencing Within the Project: Substrate preparation comes first. Once the membrane is applied, cured, and inspected, tiling can begin. Fixtures and fittings go in last. Rushing any stage to get to the next one is where projects run into trouble.
Coordinating With Other Trades: Membrane installation sits at the intersection of several trades — plumbers set penetrations before the membrane goes on, tilers work on top of it, and waterproofing needs to be complete before either can finish. We coordinate directly with other trades on your project to make sure sequencing is managed correctly, and nothing gets missed.
Frequently Asked Questions
We select the membrane based on the specific project — substrate type, wet area application, and site conditions, all of which influence that decision. There’s no single product we apply to every job.
The application itself is typically completed within a day. Curing time varies by product and conditions, but we generally allow 24–48 hours before tiling begins.
Yes. Every membrane installation we carry out meets the requirements of AS 3740 — the Australian Standard for wet area waterproofing.
A membrane that’s been correctly selected, applied over a properly prepared substrate, and installed with attention to corners and penetrations should last the life of the renovation — typically 15–25 years.
They do. Salt air and year-round humidity accelerate deterioration in products that aren’t suited to coastal exposure. We account for that when selecting membranes for homes across Newcastle’s coastal suburbs.
It depends on the condition and type of the existing membrane. We assess it first — in some cases, it can be built over, in others, it needs to be removed before a new membrane goes on.
Get a Free Waterproofing Assessment
If your project involves a bathroom, shower, wet room, balcony, or laundry — the membrane is the step that determines whether everything else holds up long term.
We’ll assess your project, recommend the right membrane for your specific situation, and give you a clear quote with no obligation.
Request Your Free Quote
📞 Call us direct or fill out our quote request form — we respond within the same week, we come to you, and there’s no obligation to proceed.
Service Area: Newcastle and Hunter Region
Find a Local Bathroom Renovations Company in Newcastle